Custom Applique Canvas Bag from Scratch
- Caleigh Goodwin-Schoen

- Sep 30, 2019
- 2 min read
Updated: Jul 20, 2020
Using the machine turned edge technique, create a sturdy canvas bag with a personalized applique design and lining.


Last week I taught a sewing workshop at the Carnegie Mellon makerspace, where I work, and we all designed custom applique canvas bags! If you would like to learn to create one as well, take a look at this tutorial.
Sketch an outline of your desired applique shape, trace the design onto fusible interfacing, pin the non-glue side of the interfacing to the right side of your fashion fabric, and sew along the line you drew.
Cut out the design, leaving a 1/4 inch buffer, and clip notches on any corners, points, or curves. Cut a strip in the center of the interfacing, and use that gap to turn the applique inside out. Use a pencil to poke out pointy corners and smooth curves.
Cut out two equal rectangles of utility fabric (I used canvas) that is slightly bigger than the size that you want you bag to be. Pin the design in the middle of your utility fabric, and sew around the edge using a top thread that matches your fashion fabric. Try to sew as close to the edge as possible so the design is securely attached.
Add additional embellishments using decorative stitches.
Cut out a 1 inch square at the bottom corners of the bag. Sew up the two vertical sides, the horizontal bottom, and optionally press the seams open. Pull the fabric pieces apart at the corners you just cut out, match the bottom and side seam together, and sew a straight line across to secure them together.
Cut out two rectangles of lining fabric that match the size of the utility fabric, sew up the sides and bottom, except leave a wide gap on the bottom edge. This will be used later to turn the bag inside out.
Create optional boxed corners. Leave the lining inside out (seams showing) for the next steps.
Cut 2 inch wide strips out of the utility fabric, and make them into 17 inch long straps using a method similar to creating bias tape.
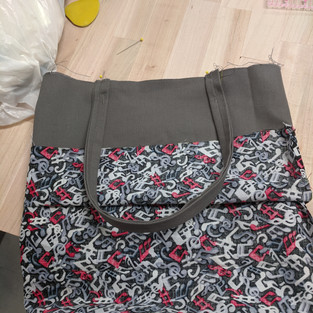
Mark where you want the straps to be with tailor's chalk, and set them up in the orientation you want them to end up in, to make sure they won't end up twisted. Next, flip them down and pin them in place. Slide the INSIDE OUT lining OVER the RIGHT SIDE OUT utility bag.
Tuck the straps between the lining and utility layers. Pin the top edges together, making sure the seams line up.
Finally, sew the top edges together with a 1/2 inch seam allowance. Turn the bag inside out using the gap in the lining. Once right side out, sew the gap closed, and tuck the lining into the bag.
Here are some pictures from my workshop!


Comments